How to Take Great Study Abroad Photos
If you are getting ready to take flight and expand your horizons through UM-Flint’s study abroad opportunities, then congratulations! You are about to embark on an adventure that will likely change your entire world-view. While you are out exploring, making new friends, and learning new lessons you might want to document your travels, and how better than through photos?
You don’t have to be a pro or have expensive gear to get great shots (though sometimes that does make it a little easier)! Most of you reading already have a camera sitting in your back pocket (your smartphone) or know someone with a point-and-shoot digital camera you could borrow as long as you promise to “try really, really, really hard not to lose it.” Those options are both more than adequate for grabbing travel photos. No matter what, though, you will want to invest in plenty of memory cards and batteries—so whether you are shooting on your iPhone or packing up that new DSLR, make sure you have plenty of GBs to shoot with. Don’t just get one big SD card, either—break it up into smaller cards. That way if you lose or corrupt one memory card, you still have the photos you took on the others packed safely away at your hotel room. If you are using your smartphone and have reliable access to wifi (or assuming you don’t care about your roaming bill, data), consider backing up your images on the cloud—services like DropBox offer student’s a few GBs of free digital hosting just for signing up with a university email address.
Okay, so you’re set with your camera and your memory storage, and are ready to take on this trip—great! Here are 5 tips to make those photos GREAT—maybe even worthy to publish when you get back (or at the very least, to frame in your room).

An action-portrait will generate the best smiles from everyone. Found on thisworldmusic.com

A capoeira class, shot wide to capture the action! Found on empowermentarts.org

Nursing students learning in the Dominican Republic. Found at msutoday.msu.edu
Capture the action with the locals
While traveling, you are going to meet a lot of interesting people—you’ll probably even make a couple of cool new friends (pen pals for life!). When you feel a connection, ask for a photo to remember them by while participating in the activity/lesson they are teaching you. If you are submerged in a new and different culture and find the fashion interesting or a dance performance beautiful, don’t be afraid to ask if you may capture a few photos. If you want to be candid, make sure you approach them after the photo is taken to let them know they’ve been photographed. Courtesy goes a long way, and they may want you to share the picture with them—instant friendship! If there is a lot of movement in what you are trying to capture (a dance, martial art, or other kind of performance) remember to shoot wide or back up into an area that is clear for the best shot. You can always crop in closer later.

A street market in Delhi, India. Found on travel.allwomenstalk.com

Coffee in Saudi Arabia. Found on intelligent travel.nationalgeographic.com
The ordinary can be extraordinary
When we go to Paris, of course we will want to take a picture of the Eiffel Tower. Those are the extraordinary moments—the things everybody wants to see and remember—but what many people don’t realize is that the extraordinary things (the tourist attractions) are not what define our experiences with a place. Of course you need to capture those moments, but don’t forget to get a shot of your favorite coffee shop, or the street market you bought breakfast from on Saturday. Capture the things that seem ordinary, because once you return home you’ll realize they are actually quite special. These types of photos will authentically represent the places you are visiting.

Nesting dolls from Russia. Found at toursofrussia.com

Shoe shopping in the UK. Found on guim.co.uk
It’s the little things that count
Who cares if your friends will make fun of you on Instagram—take a picture of your meals while you’re abroad! Photograph the cool little knickknacks you find while going window-shopping, or grab a close up of the painting you are viewing so you can see the texture that the artist added.

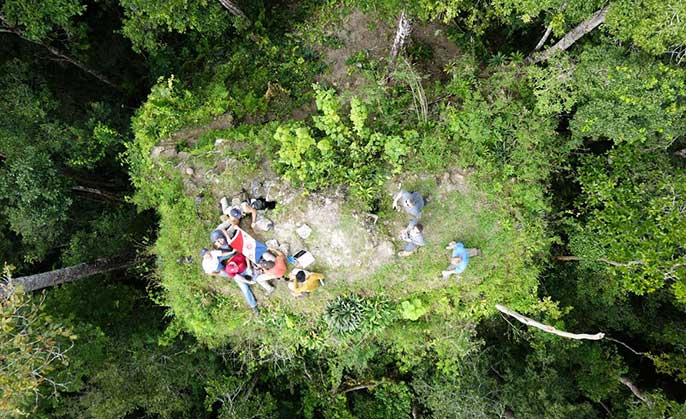
Looking down from an ancient Mayan site. Found at universityofcalifornia.edu

Kneel down and get the cool critters you spot on your trip, too. Found at wisc.edu
Think in Angles
Take a photo looking at your feet/down at the ground, then take one at normal perspective (head-on), then looking up at the sky whenever you are at a cool new location. If you can’t fit a big building into your shot, get low on the ground—crouch, kneel, lie down even! Sure, you might look ridiculous for a moment, but this is about what is in front of the camera, not behind it (that is, unless one of your peers or professors snaps a goofy shot—but then it’s an excuse to grab a revenge picture of them sleeping on the tour bus). Remember that you can take horizontal (landscape) and vertical (portrait) photos. Don’t get stuck with one orientation just because of the ergonomic design of the device you’re using. Be willing to climb atop ladders or hills or piles of rocks to get the bigger, better shot. Don’t be afraid to back way up or get in super close to grab the best shot (but, you know, respect personal space, too).

The group only takes up the bottom half, showing the length/depth of the Great Wall of China. Found at TravelChinaGuide.com

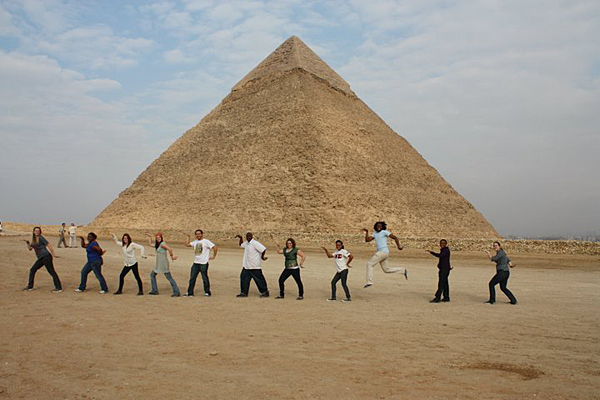
Posing with a pyramid. Found at udel.edu
Grouping together
You’ve spent days—maybe weeks—sharing this travel experience with new professors and classmates, maybe even a host family or two. The timeline of life has a crazy way of introducing you to great people that you may never get a chance to see again after the experience is over. Naturally, you want a group photo with these people who will remain in a special place in your heart and memories. For the best group shot, pick an area where everyone is evenly lit. If it is high noon or “the sun is burning our eyes,” group together in a shaded area and make sure the group isn’t “silhouetted.” If one direction doesn’t work, turn everyone around and shoot from the other angle. Is the group REALLY big? Shoot from above–get on a balcony, climb the stairs, or stand on a hill and shoot downward. If you have to, be brave and ask a passerby to click the shutter button for you so you can get in the shot, too. Ask them to take two or three photos so you can pick the one that looks the best. If you are trying to show a monument or establish a specific location in the background, make sure the group doesn’t take up more than half of the actual photo: try moving everyone forward so that the scenery is shown in the background, or having everyone stand off to one side of the photo so that the other side can focus on the monument.


